
Before we examine the steps of the design thinking process, I want you to understand this fundamental truth. Design thinking is best described as systematic chaos. And although that may seemingly feel like a natural dichotomy, this is far from the absolute truth. If anyone tells you otherwise, I would be skeptical of their individual experience at creating anything other than false narratives.
Now don’t get me wrong, there are procedural steps to help give you direction. But by no means is there a clear and straight-forward path directly linking you to success. Designing, especially from scratch, is non-linear and often feels like walking alone into the pitch-blackness of uncertainty. Luckily, I’ve entered the abyss and successfully returned—at least on a few occasions.
Please allow me to serve as your official tour guide as we venture into this space together.

Understanding the User: A Guide to Empathy
The first stage of the design-thinking process serves as the greatest indicator of how successful a design solution may be. In fact, failure to properly adhere and give credence to this integral step may predispose your efforts to failure before you begin. Oddly enough, this stage is often misunderstood because it’s not always given proper value, weight, or regard.
When you empathize, you do everything within your power to learn about your users’ needs. This entails comprising a culmination of observations, interviews, and additional means of attaining a deeper foundation of what an individual may be experiencing, feeling, and living through. This is where the designer attempts to become one with the individual whom he/she is designing for. The onus is placed on the designer to learn the ins-and-outs of a situation and the people experiencing that situation. And the reason that takes on so much weight is because you can’t solve “MY” problem if you haven’t taken the time to acknowledge your own inherent biases and completely accept who “I” am (e.g., my values, my identity, the truths that ground me).
Granted, in my case, this was a relatively straightforward process. Simply because I was living and breathing the problem with my students. That is to say, number nonsense wasn’t their individual problem or mine alone. It was our collective struggle. And because I had this acute awareness, I was able to clearly articulate the problem and then frame it into a solution-oriented statement to guide the subsequent steps (defining the problem).
Please keep in mind that when engaging in this step, it is imperative that you stay clear of any form of ambiguity and focus on brevity. Otherwise, you risk developing a solution to a problem that may not actually exist (problem misalignment).
The What: Ideate
After empathizing and clearly defining the problem, I was ready to move into the brainstorming stage (ideation). When you ideate, you aren’t overly concerned with the actual quality of an idea. Hence, quantity takes prominence over quality in this stage. And that’s exactly why this is easily my favorite stage. There is no such thing as an outrageous idea here. Small, grand, strange, colorful; they are all accepted. Granted, you do have to keep in mind that there are real-world constraints (e.g., time, money, etc.) that could inhibit your efforts. So please avoid the leprechauns and unicorns!
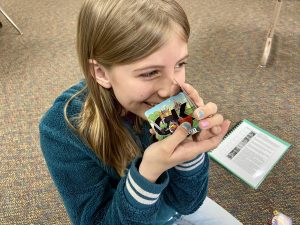
Once all the ideas were in front of me, I went through them and selected a game-based learning option (GBL). I chose this solution because I saw it as an organic extension for my students to co-create with me. For example, at the time, Pokémon trading cards were the biggest frenzy. And I wanted to leverage my student’s passion for this and use it as a learning opportunity.
And if I’m being 100% honest, my selection may have been somewhat impartial because the idea of creating a GBL product inspired by Pokémon was straight-up nostalgia-inducing as I was brought back to my own fourth-grade classroom, roughly 20 years ago. So, I wanted to capitalize on our collective love of Pokémon and trading cards.
3, 2, 1, Prototype, Launch!
After formulating and selecting my most rational idea, I moved on to the most frustrating stage (prototyping). I describe this as the “make-or-break” stage, on account of ideas and dreams either slowly burning to embers here or fully taking form and bursting into something magnificent.
In this stage, you take an idea that you formulated/hypothesized during ideation and try to bring it to life to demonstrate a proof of concept. Often, this entails going back to the drawing board altogether because the prototype didn’t live up to expectations. And keep this in mind, that is absolutely normal!
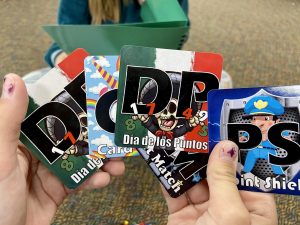
My idea was to create a card game that would help students develop their number sense. But I didn’t know where to begin. And the more I thought about it, the more confused I became. I had more questions than answers. For example, how many cards would be in this deck? (Eventually there would be 42 cards in 1 deck with 21 unique cards. Those cards would include a combination of common cards and rare cards—exactly like a Pokémon deck. However, I started off with 10 cards and slowly added cards based on student recommendations.)
How Does It Work?
How were the cards aligned to my learning objectives? (Each unique card has a specific standards-aligned function to it.) How was this true GBL and not gamification? (The core mechanic of the game [action] involves understanding numbers and operations flexibly through multiplying, adding, subtracting, dividing, rounding, etc. Hence, number sense is fostered through direct gameplay for all who play.)
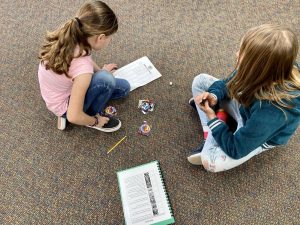
This is easily where I spent most of my efforts, but the best part was that I was not alone. My students and I often had extensive discussions about our game and how to ensure it was a true learning opportunity that kids wanted to play (i.e., there had to be an element of fun embedded within the game.). We even went as far as discussing the meta of the game to ensure that no cards were overpowered. This created a system of checks-and-balances through the structure of the game to ensure a level of equilibrium, leading to more competitive matches.
Over the years, I found a manufacturer, card packager, and graphic artist to help bring the product to scale and eventually launch it. At this point, the game has helped thousands of students across the nation and has even gone international. And the best part about all of this? My students and I co-created the game together through the design thinking process to help get us solve the problem we were collectively facing. And now it’s your turn!


Leave A Comment