
It’s an unprecedented time as many students across the country are at home instead of in the classroom. Teachers are looking for ways to connect with home-tethered students while parents act as facilitators.
While there are endless science experiments that can be done at home, it’s important ensure that learning takes place and that these lessons and concepts are conveyed as experiments rather than time-filling activities. Here are a few of my favorite at-home science experiments that can be done anywhere and the explanations behind them.
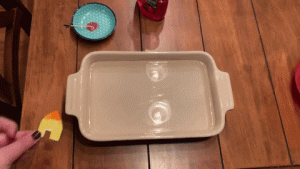
Soap Boat Races
Experiment Setup
Have students cut a boat shape out of a piece of paper and include a notch in the back of the boat. Fill a shallow pan with soap water and place the boat shape gently on the water’s surface. Dip a toothpick into soap and place the tip of the toothpick into the water where the boat’s notch is. Watch the boat propel forward in the water!
Science Explanation
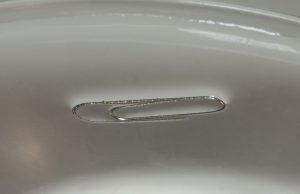
The boat can rest on the top of the water because of surface tension. Surface tension is a chemical phenomenon where the surface of a liquid acts like an elastic membrane. If you’ve ever seen a water droplet on a leaf, you’ve seen an example of surface tension. The water molecules are “sticking” (attracting) to other water molecules. This surface tension supports the weight of the thin paper boat. Similarly, surface tension would work on a paperclip or pepper.
When you add soap in the water, the surface tension is weakened, and this elastic membrane breaks apart. This causes the boat to propel forward to an area of higher surface tension, an example of the Marangoni Effect (the tendency of mass to travel to areas of higher surface tension within a liquid). To make this experiment last longer, swap soap with rubbing alcohol.
Similar At-Home Experiments
Pepper dispersing on the surface of water or shaving cream prints.
Conductivity Meter
Experiment Setup
Fill a glass with distilled water (if available, otherwise use tap water). Connect an alligator cable to one leg of an LED. Similarly, connect another cable to a paper clip. Add in a battery. Place the non-connected leg of the LED in the water. Then put the paper clip in the water.
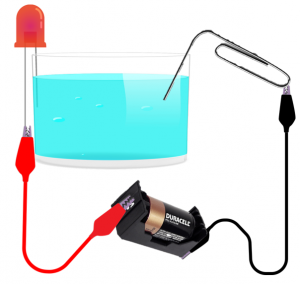
Science Explanation
Students learn that water is conductive but may be surprised to see that the LED does not light up in distilled water. When you slowly add salt to the water, the LED will light up. Table salt is an electrolyte and when dissolved in water becomes sodium and chloride ions. These ions conduct electricity making the salty water a conductor. The conductive water completes the circuit, allowing electricity to flow and illuminating the LED.
If you don’t have distilled water, you can use tap water. Tap water is conductive because It contains conductive material like minerals. To expand on this experiment, have students test distilled water, tap water, and natural water (i.e. river, lake, or ocean water). Which of these is the most conductive?
Similar At-Home Experiments: Bristlebots and penny batteries.
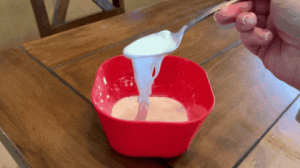
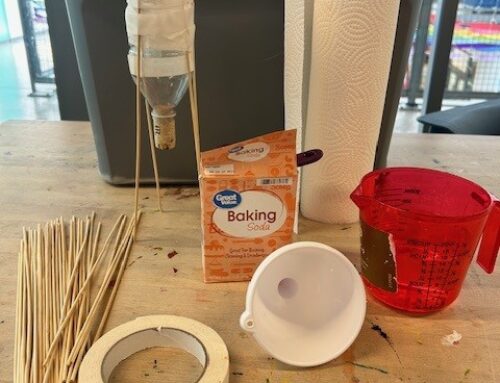
Oobleck
Experiment Setup
In a shallow pan or bowl, mix roughly 1 cup of water with about 1.5 to 2 cups of corn starch. After the water and the cornstarch completely combine, try moving the mixture around quickly with your finger or a popsicle stick. Also, try pouring the mixture into another container to observe how this mixture behaves under different applied forces.
Science Explanation
Oobleck (a term coined from a Dr. Seuss book) is an example of a non-Newtonian Fluid (seemingly ignoring Newton’s Laws!). When poured slowly, it behaves like a liquid. However, when pushed quickly by a popsicle stick or your finger, it acts like a solid. The cornstarch grains are suspended in the water when the two are mixed. This creates the non-Newtonian properties of this mixture. Under an applied force, the fluid becomes more viscous because the water molecules are trapped between the cornstarch particles, temporarily turning the Oobleck into a semi-solid material.
To extend this activity, have students first read Bartholomew and the Oobleck by Dr. Seuss and then create their own Oobleck. You can also add food coloring to the mixture for even more fun!
Similar At-Home Experiments
Creating your own slime!


Leave A Comment